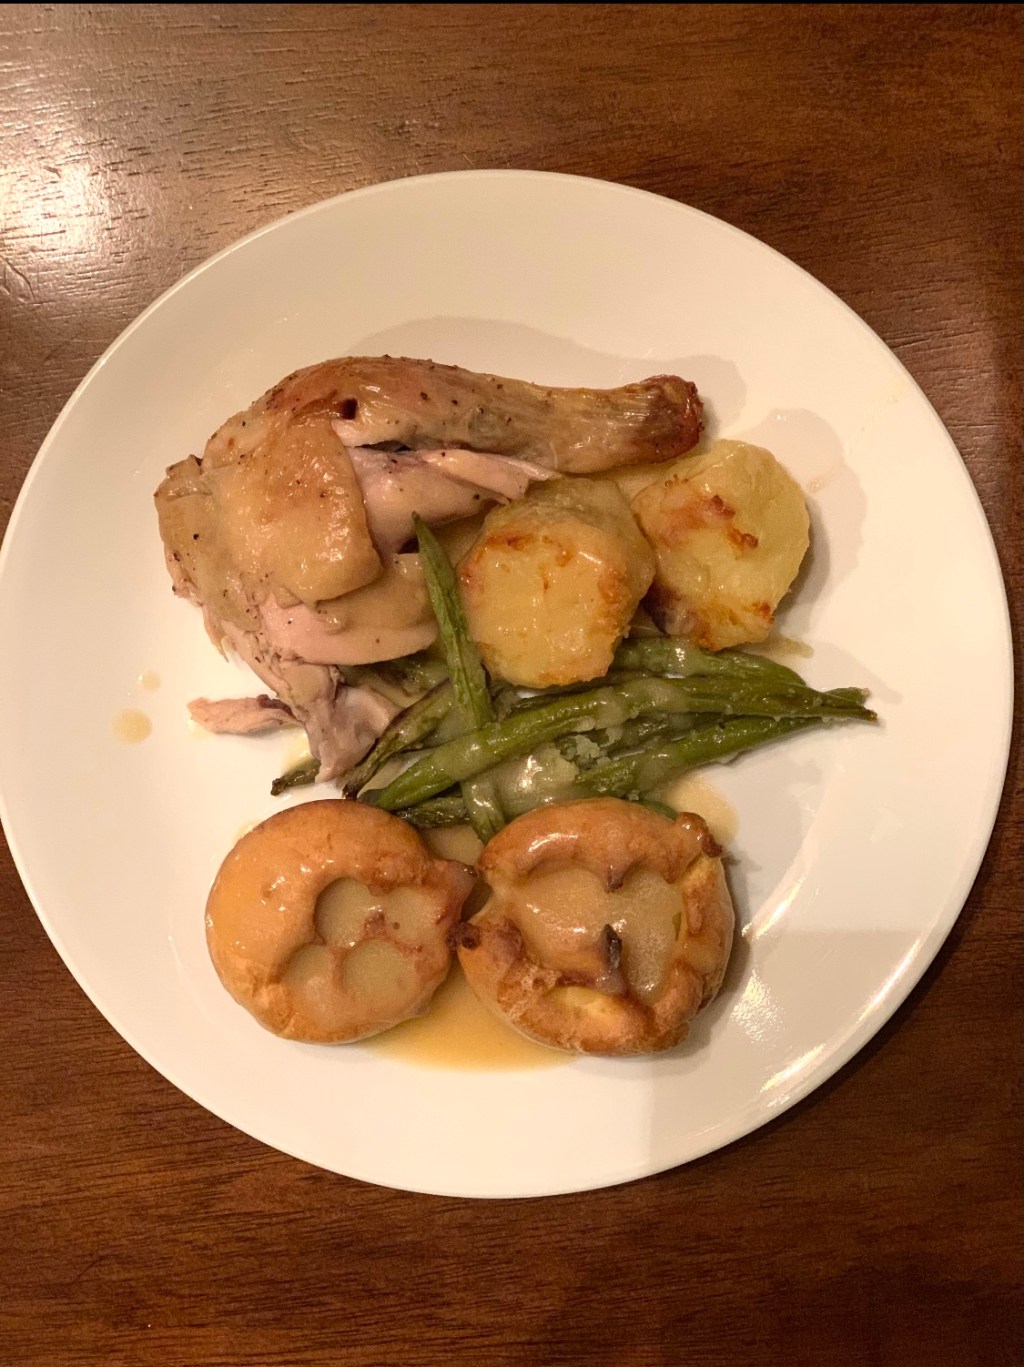
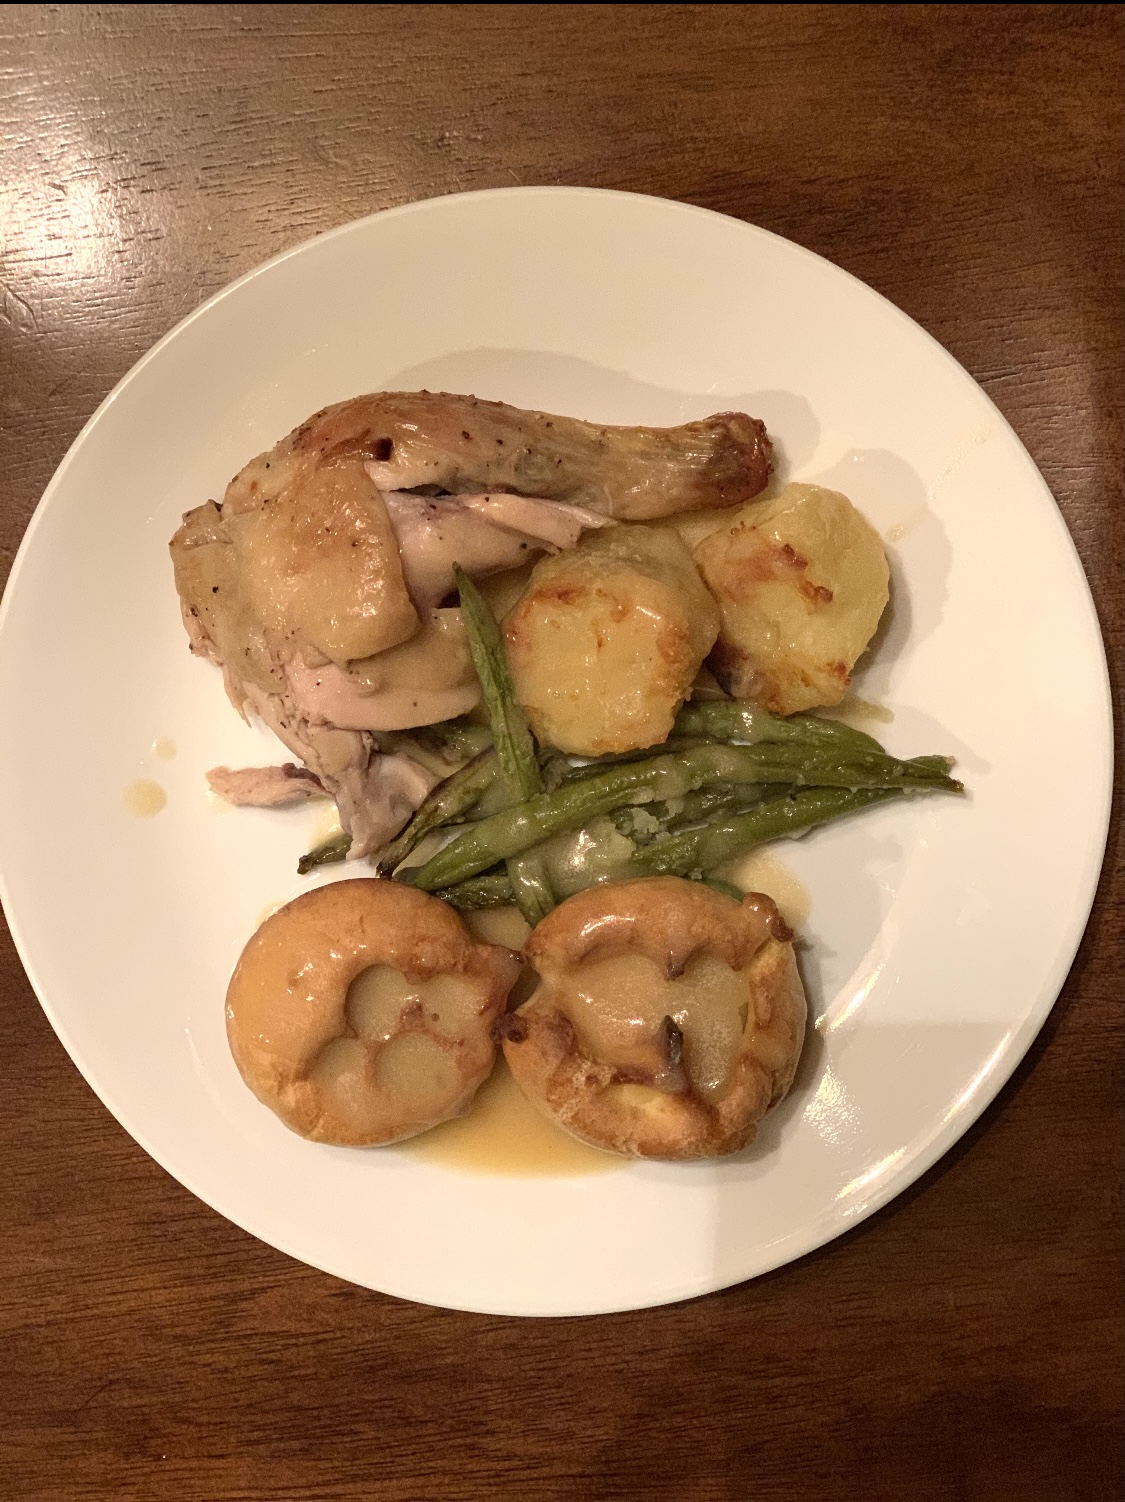
It can be daunting to make a home-cooked meal for family or friends, but a well-planned Sunday roast like this can be a great option!
As long as I remember, my mouth has watered at the sight of a beautifully made Sunday roast. It always looked elaborate to me, with several elements to think about, and while I practice my roasted chicken skills from time to time (learning to season, bake, and carve the chicken), I hadn’t ever attempted a whole Sunday roast meal from scratch… Until now. This is definitely a few steps up from a meal made from a box, but not so complicated that you need advanced cooking skills to make it (I would say it is doable for a beginner cook). I was inspired by some Jamie Oliver recipes (linked below), but I put my own spin on most of the elements using the ingredients I had available. This post is a breakdown of each element, what I used/changed, and some tips I picked up that I know will help make the next roast even better!
What is a Sunday roast?
A traditional British meal served on Sundays. Consists of meat (usually beef, but can be other meat as well, like chicken which I opted to use), potatoes, vegetables, gravy, and Yorkshire pudding. Read more about the full history here.
What I’m making
- chicken and vegetables
- roasted potatoes
- green beans
- broth made from chicken drippings and water
- Yorkshire pudding
- chicken gravy made with broth
Quick Tips:
Most of the recipes from a Sunday roast I’ve made at one time or another, but I would say the most challenging thing about this was juggling so many elements at once and having it all come together. I knew I wanted to make this on Sunday, so that gave me about a week to plan. It greatly helped me to look over all of the recipes, make sure I got the essential ingredients (namely the whole chicken), give myself enough time to thaw the chicken in the fridge, and take a mental note of what ingredients I already have that I could use. When it came to cooking, I made sure to start a few hours earlier than I normally do (around 4 pm), and I also thought it was practical to start with what would take the longest. I got the chicken in the oven, worked on the potatoes and vegetables, on to the Yorkshire pudding, then finished with gravy; this order of things seemed to work well and I didn’t feel like I was multitasking too much. I definitely took my time, not rushing through anything, but dinner was still ready at 8 pm. Although this is longer than I would usually spend on cooking any one meal, it was so worth it!
Chicken
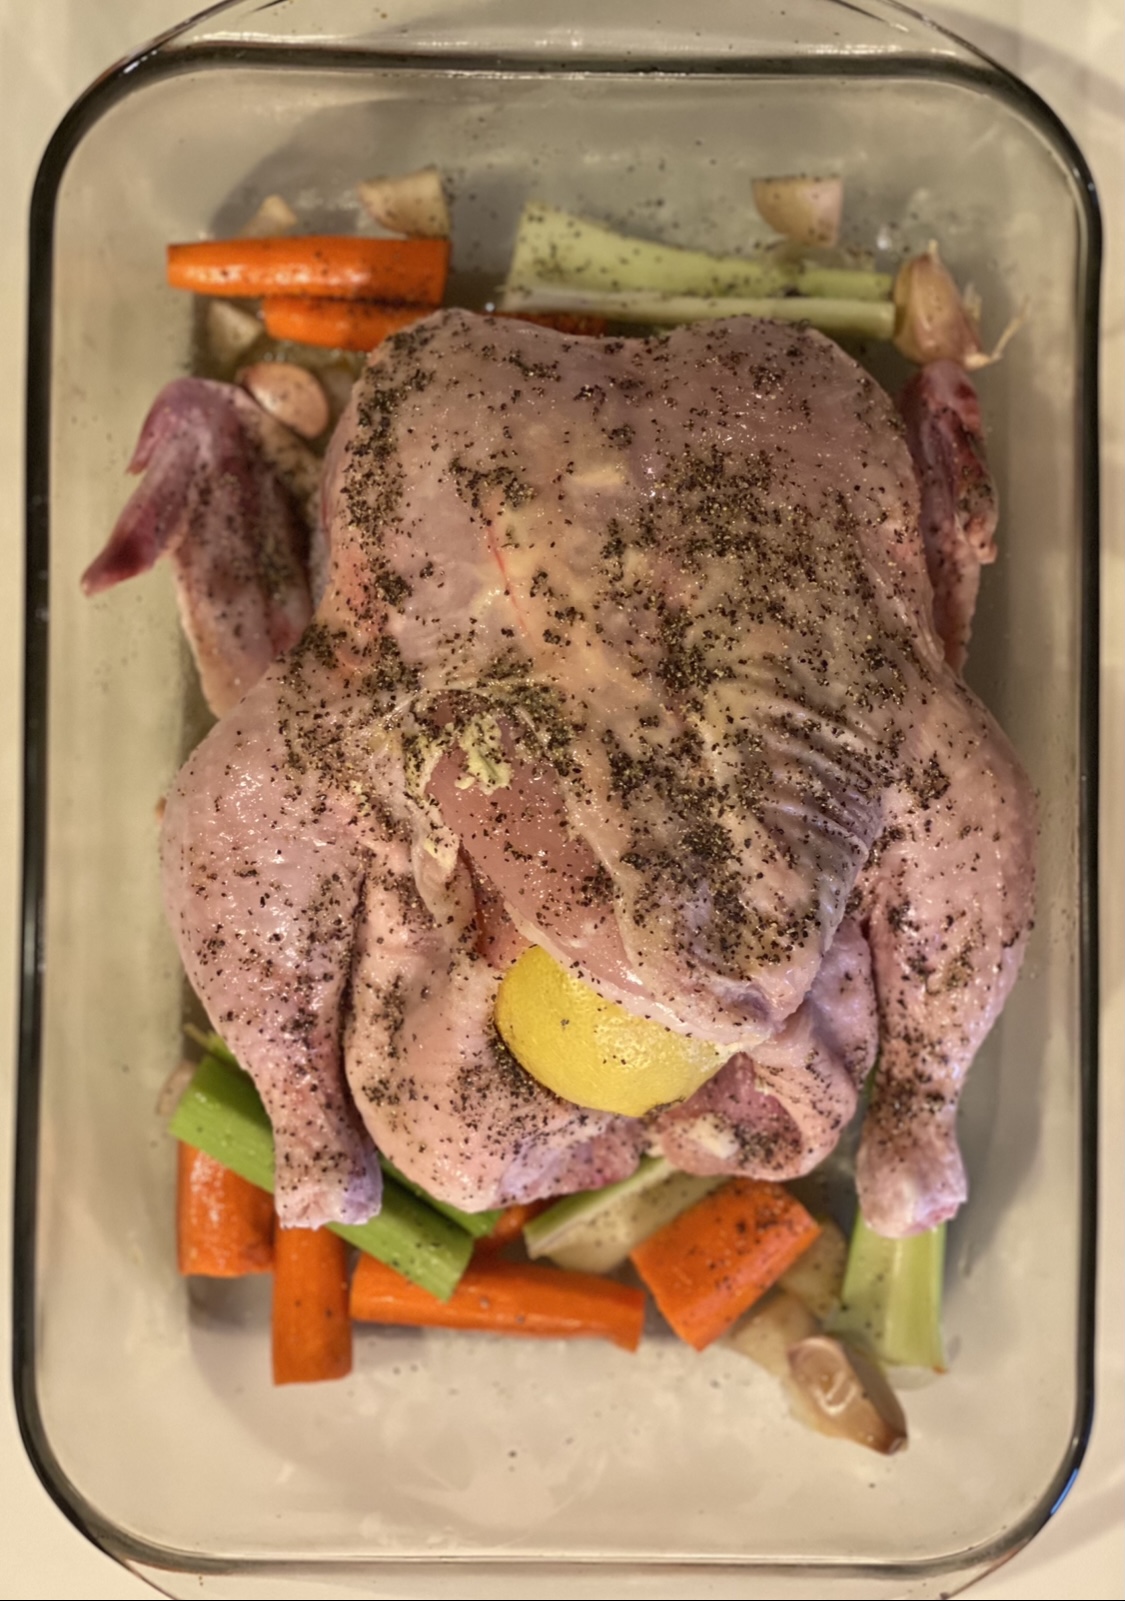
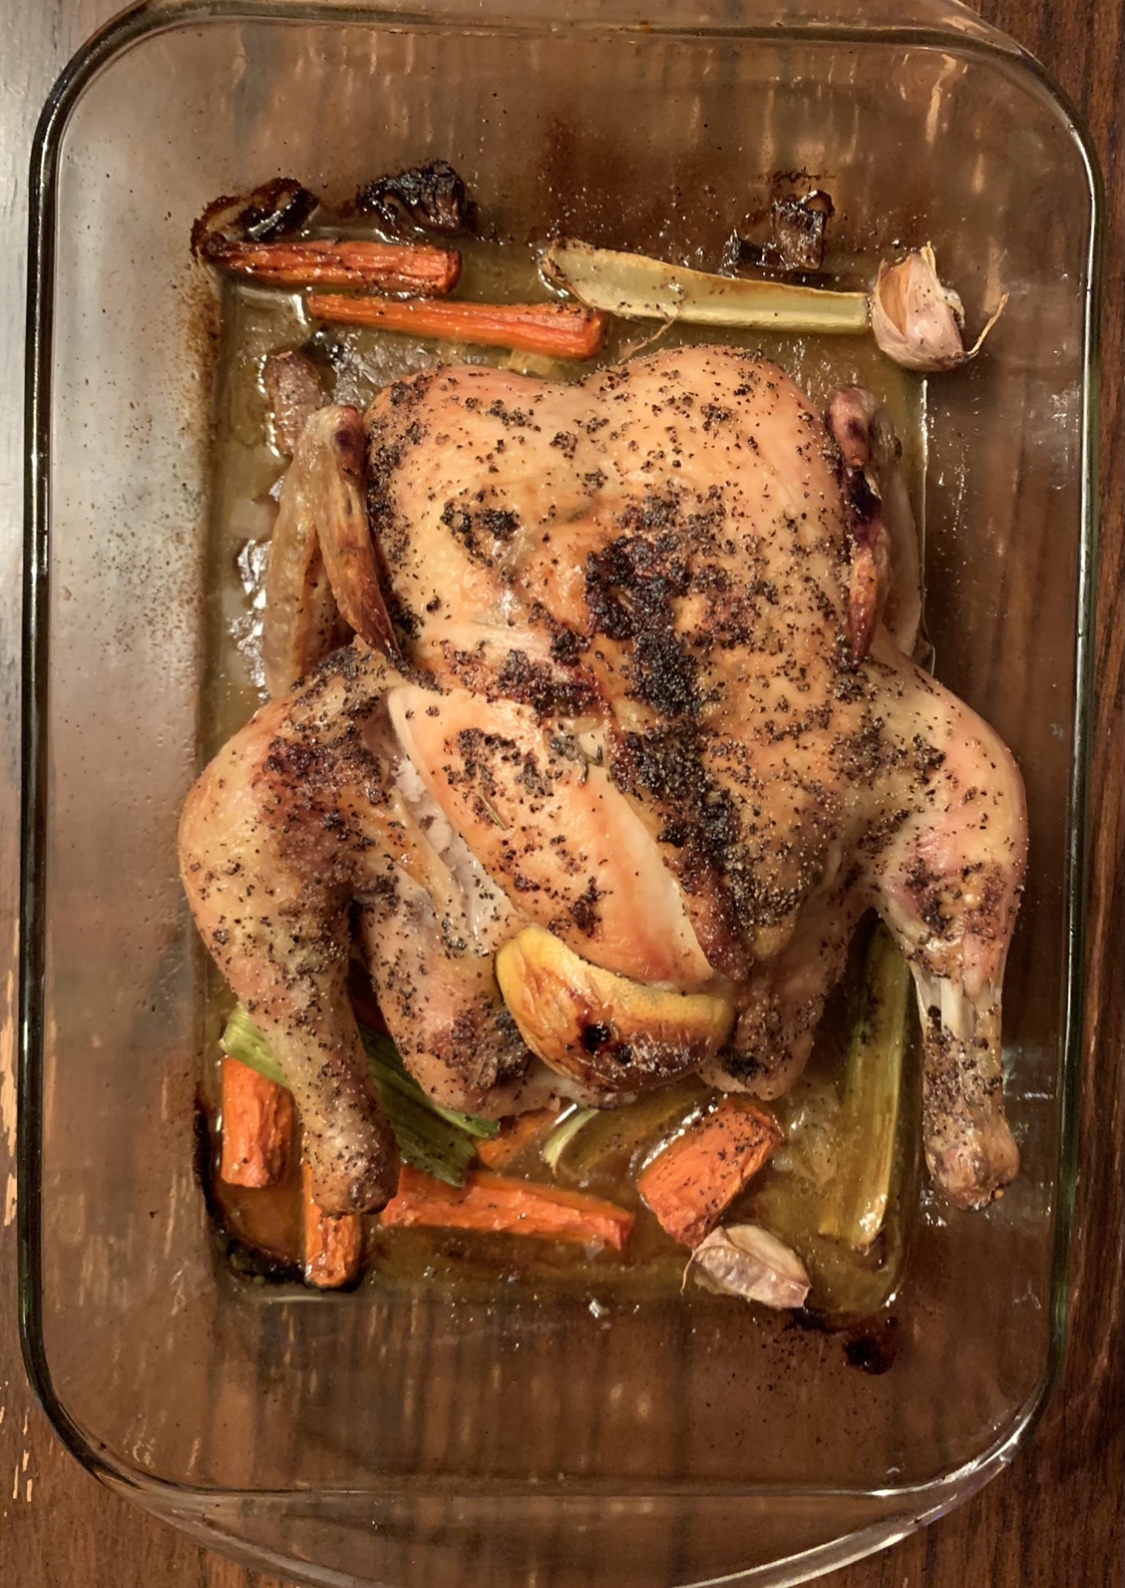
– If you’ve never baked a whole chicken before it can seem quite tricky to get right, but it’s not much different from baking other cuts of chicken. To start, find the best quality you can get and make sure it is thawed completely before cooking. For reference, I had a smaller bird and it took about 2 ½ days in the fridge to thaw. Just be sure to plan on putting it in the fridge at least 2-3 days before cooking.
– I added some water to the bottom of the pan when cooking the chicken, which is something I often do to prevent dry meat, and in my experience, it acts like a deglaze/brothy base ( I did use the liquid for broth later on). This is optional, but I found it made a broth that burst with flavor and amped up the whole meal.
– The Jamie Oliver recipe calls for fresh herbs but all I had was basil, so I made a dried herb butter to put under the skin of the chicken. I vaguely remember reading or watching something that mentioned putting butter on the skin can burn, but putting it underneath the skin is good, so that is the rule I stuck to for this.
– When it comes to carving, you can do it before or after cooking (I prefer after for a Sunday roast). I’ve linked some how-to videos at the end of this post that you can watch if you’ve never done it before.
What I did
- One of the two things I did differently from the recipe was putting the butter and herb mixture underneath the skin; 1-2 tbsp softened butter and dried herbs to taste. I wouldn’t have done this step if I had the fresh herbs (I did use basil from my garden but wanted more variety), but it did end up being one of the tastiest chicken I’ve made thus far, so I might keep it this way unless I can get fresh herbs to compare.
- The other difference was adding water to the bottom of the pan, as mentioned above. The liquid left after the chicken was cooked and rested became the base for my broth. I actually added the water about half way through cooking because I noticed the vegetables were getting a bit dry.
Roasted Potatoes
- I make oven-roasted potatoes fairly regularly, but I took a slightly different approach with these potatoes. For starters, I parboiled them which I don’t normally do. I also just cut them in half rather the cutting into small, bite-sized pieces. I did like the texture with par-boiling, but I won’t be doing it on a regular basis since it does involve an extra step, however, I think it was totally worth doing for this roast.
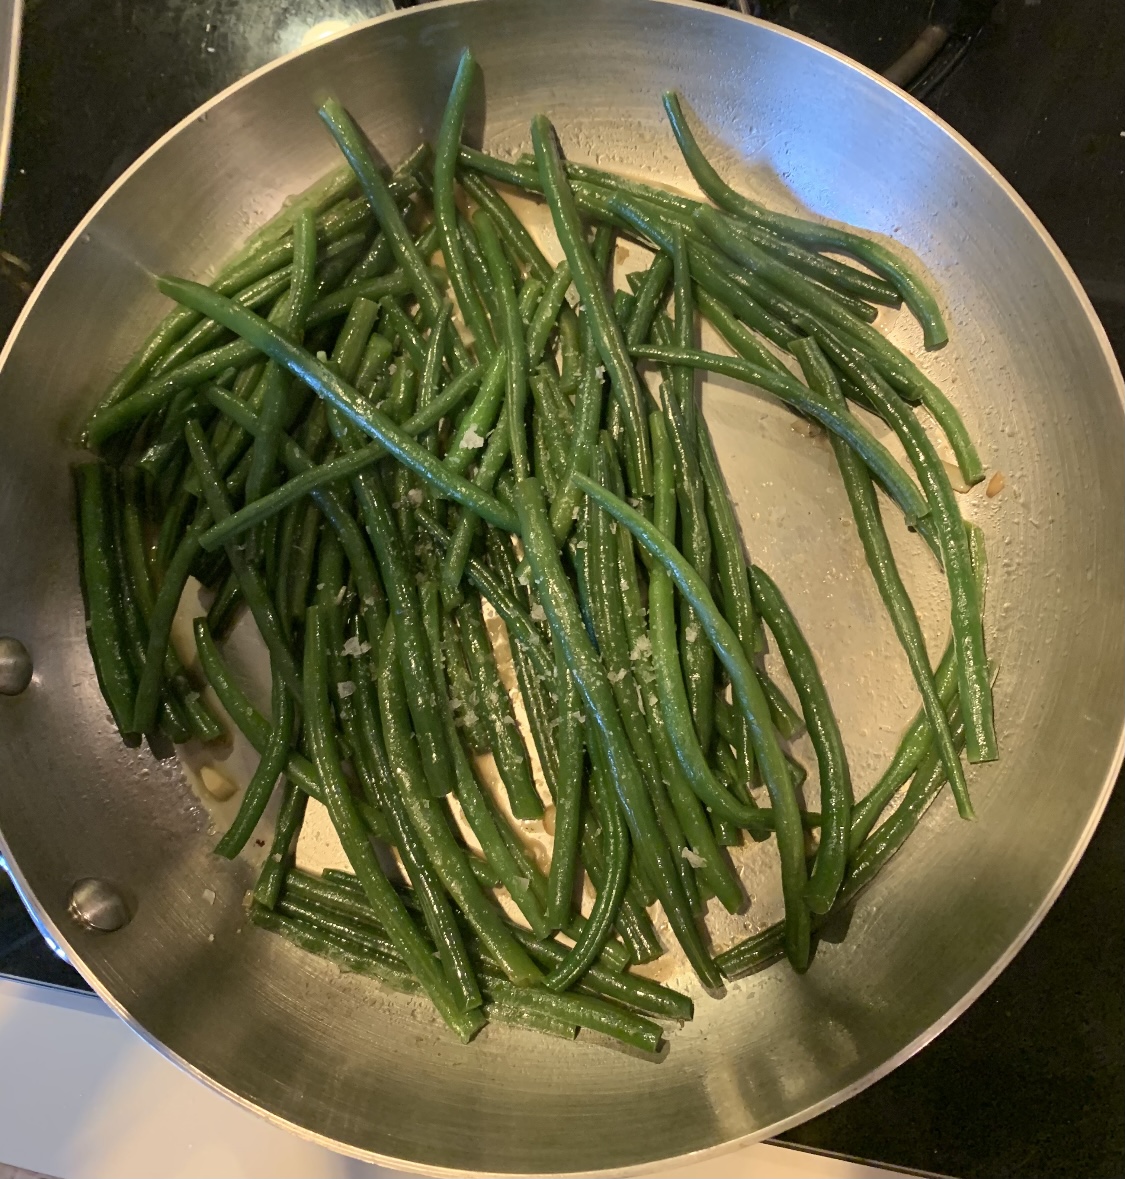
- For vegetables, I kept it simple and stuck to green beans. I did make the mistake of putting the green beans in a glass pan with the potatoes, but I would recommend baking the potatoes separately or using vegetables with a similar cooking time.
- I didn’t love how the potatoes were when they came out of the oven at first, so I put them on a baking sheet and back in the oven. I was much happier with how they turned out! Next time I will be sure to keep them separate from other vegetables.
- The recipe calls for overnight chilling of potatoes which I didn’t do so I can’t speak to how it compares. I also didn’t have fresh sage, but I would have loved to add if I did have it.
What I used
- 5-10 small russet potatoes, peeled and cut in half
- Olive oil
- Butter
- Salt & pepper to taste
Directions
Follow directions in the recipe linked.
Vegetables
You can cook your vegetables and potatoes together or make them separately. As I mentioned above, I had a bit of a mishap with cooking my potatoes and green beans together, so I am adding a recipe for how I normally cook my green beans instead. You can also just steam your favorite vegetables or roast them in the oven with some olive oil and sea salt.
Ingredients
- About ½ pound of green beans
- 1 ½ tbsp olive oil (can also use butter)
- 2 small cloves of garlic, minced
- Water
- Flaky sea salt (regular sea salt works as well)
Directions
- Wash green beans and set aside
- Melt butter in a pan
- Cook garlic in oil or butter until slightly browned
- Add green beans and a generous splash of water to the pan (enough to cover the bottom of the pan) *if you’re not using non-stick, you may need to add more water if you notice any sticking.
- Salt to taste and cover with lid.
- Cook on low-medium heat until soft (or desired texture).
Yorkshire Pudding
This is the one element of this meal I followed the recipe pretty exactly.
– The only thing that was unclear was how much oil I needed in each compartment of the muffin tin, so I googled and found a Gordan Ramsey recipe that suggested 2 tsp, and that was the perfect amount.
– Because the recipe uses the metric system for measurements I used my kitchen scale. It’s a little tricky to covert measurments in cooking and baking but I put some rough conversions below.
– The only oils I have are coconut oil and olive oil so I opted to use olive oil, however, when I was reading through Yorkshire pudding recipes it was recommended to use a higher heat oil.
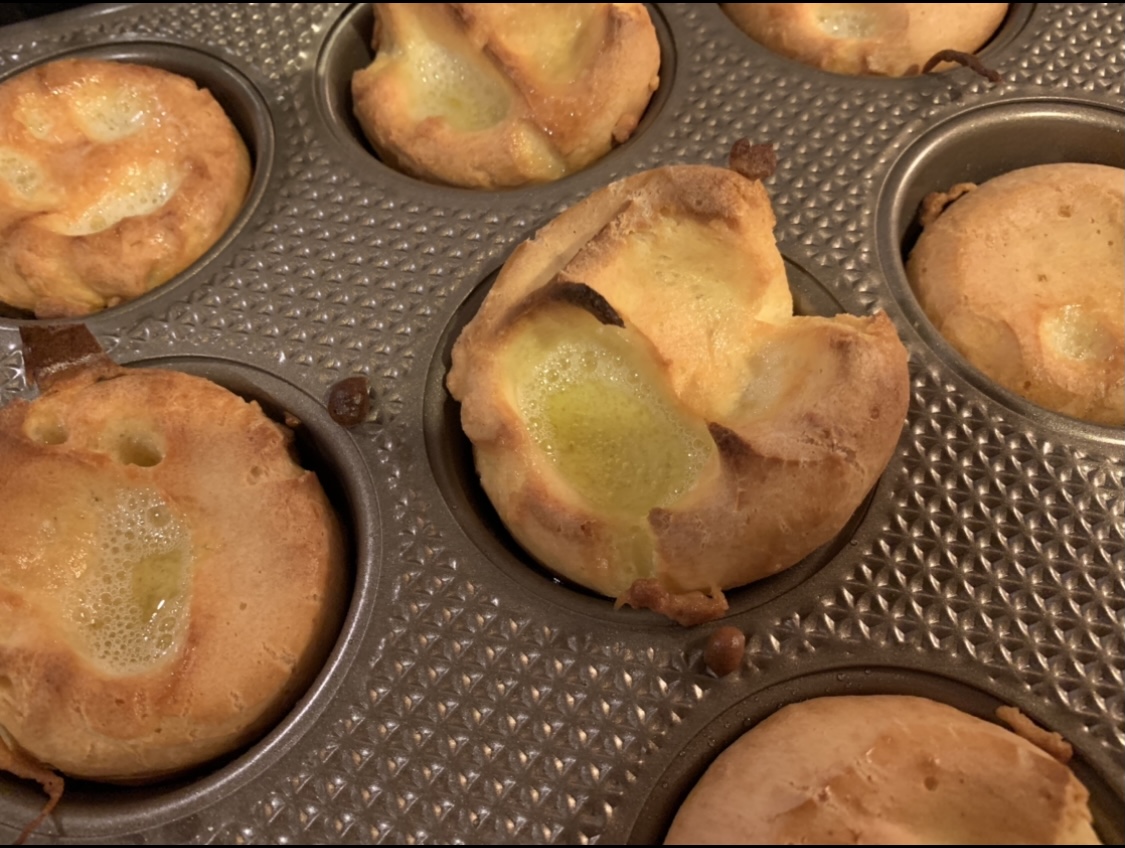
Ingredients
- 2 tsp oil per compartment of muffin tin
- A little less than 3/4 c flour
- A little less than 1/2 c milk
Broth
(Jamie Oliver recipe)
I decided to make my own broth from the drippings after the chicken was cooked and rested. You can dilute the drippings with as much water as needed to get the desired taste, depending on how much you have to begin with. I had quite a lot but wanted my stock to be full of flavor so I kept it to 4 cups of water (since the recipe calls for a liter of stock). If you don’t have enough to make stock, just use store-bought. After the chicken rests, if you find that the liquid in the pan has turned into a jelly consistency, you can use this as the fat for the gravy. Mine did not turn to jelly, so that is another reason I made my own broth and used butter for the fat in my gravy instead (see below).
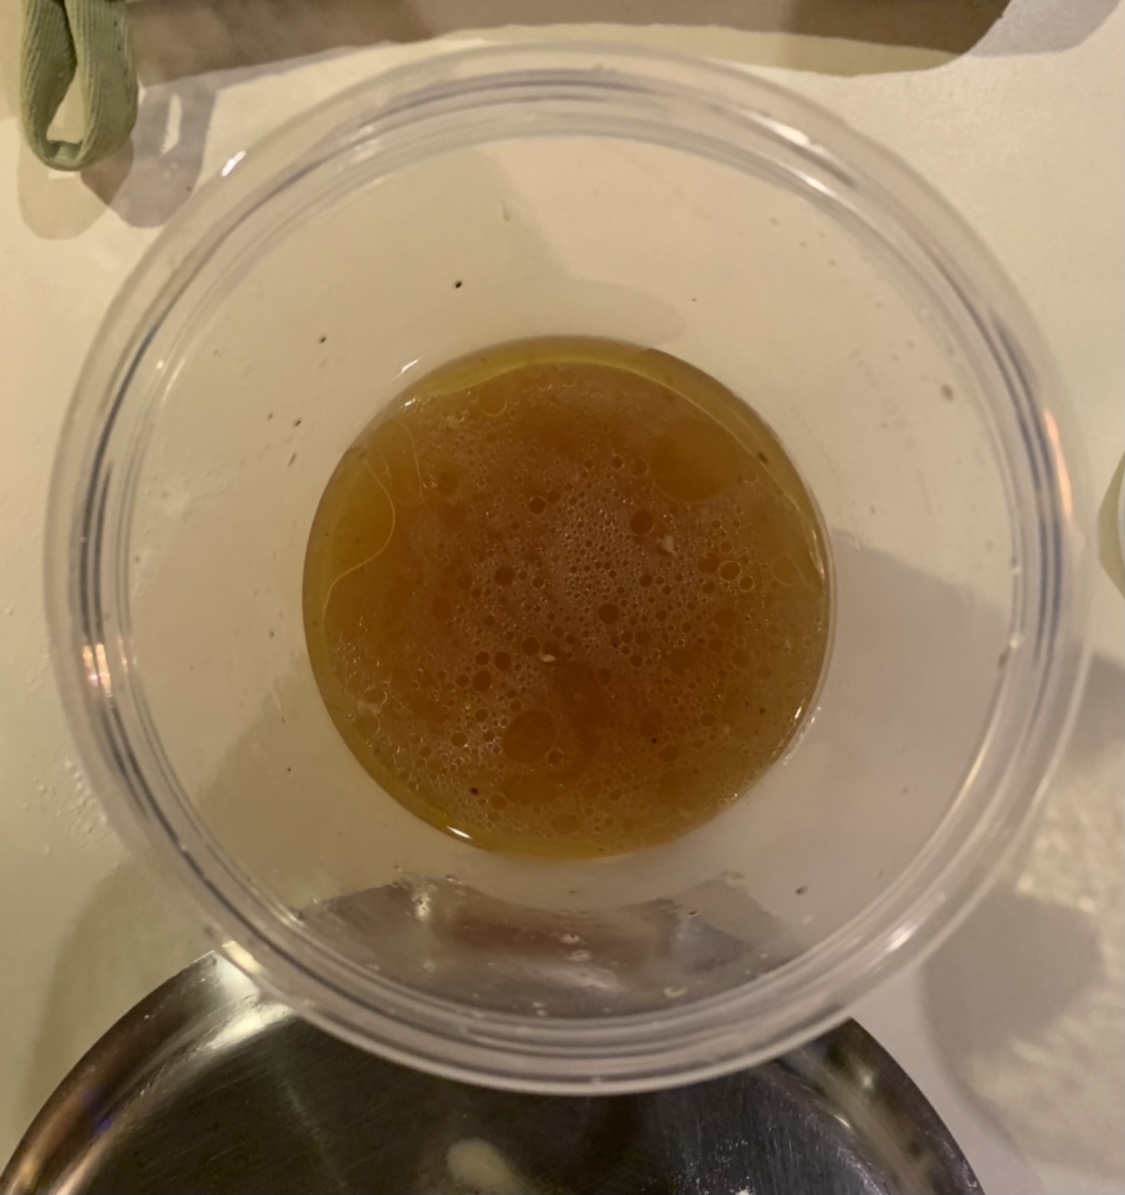
Ingredients
- Chicken drippings
- 4 C water
Directions
- Pour drippings into a storage container (you can mash the vegetables like the recipe suggests and keep them in or strain them out if you prefer)
- Pour 4 cups of water. (Use for gravy and/or keep any leftovers to add flavor to other dishes. I used it the next day to marinate chicken and it was delicious!)
Chicken Gravy
Homemade gravy is simple in terms of how few ingredients are needed and cooking time, but it can be a relatively difficult thing to get right if you’ve never done it before. Having said that, I’ve made white gravy a few times now and I found this chicken gravy much more simple, and I honestly prefer the flavor to any other gravy I’ve made. So if you’re nervous about making gravy from scratch, I think this is a great place to start. The recipe suggested skimming fat from the chicken, but I didn’t have much available fat to work with, so I used butter instead, plus all of the drippings for broth (as mentioned above).
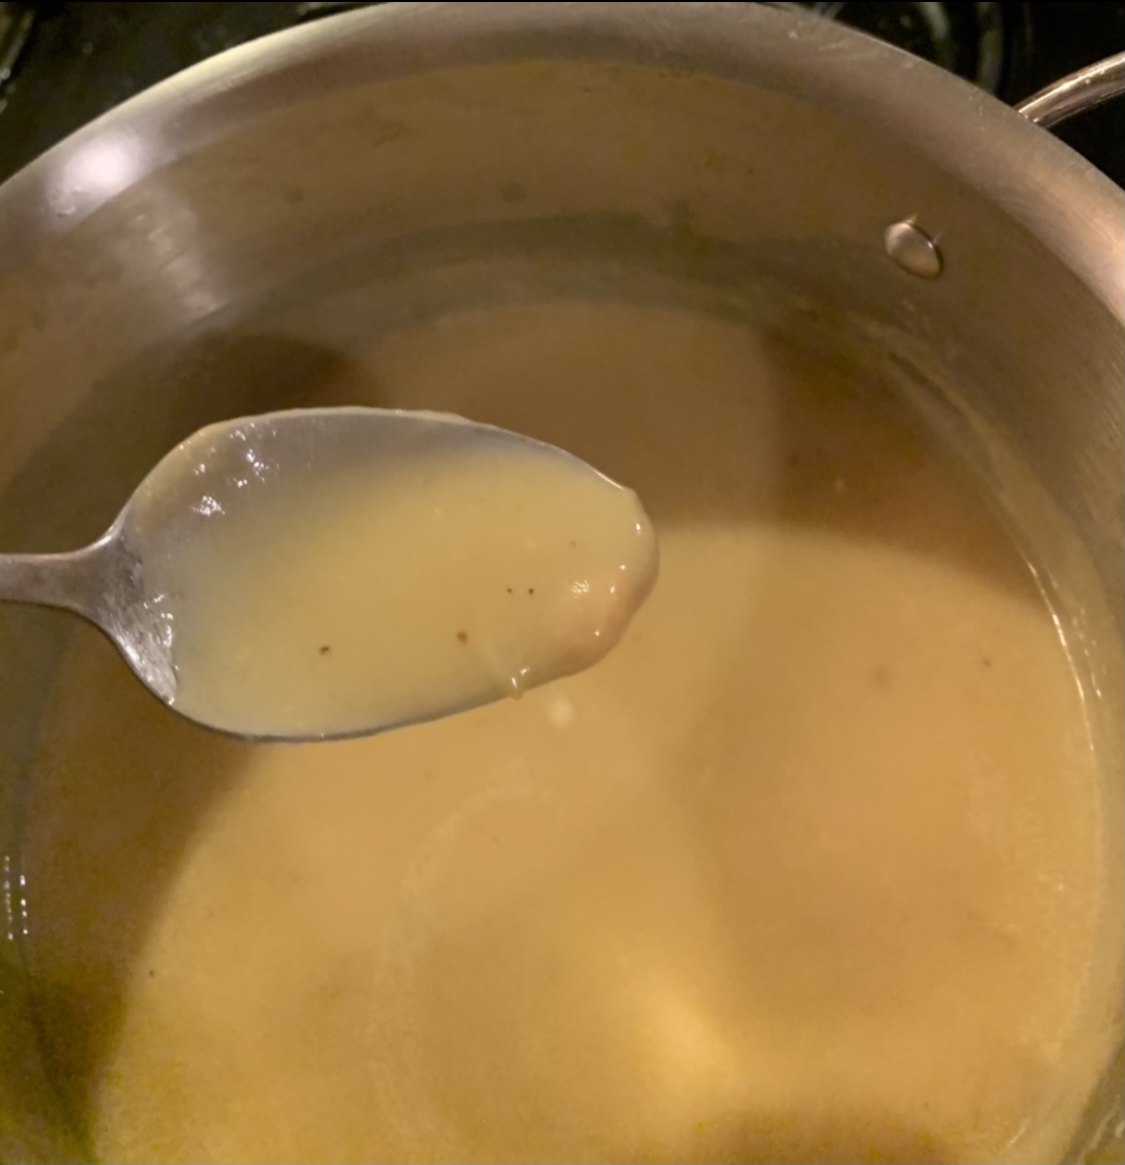
Ingredients
- 2 tbsp of butter or chicken fat
- 2 tbsp all-purpose flour
- 2 ½ – 3 C chicken stock (you can add as much as needed to get to desired consistency)
Directions
- Melt butter in a sauce-pan.
- Add flour and whisk until slightly browned (it can go from brown to burnt quickly so keep an eye on it).
- Once slightly brown, add liquid, about a cup at a time, and bring to a simmer, whisking constantly until all lumps are gone.
- Keep adding liquid (and simmering) until the gravy starts to thicken. It will thicken while cooling so if it already seems too thick while it’s still hot, add more liquid.
- Once it gets to a good consistency, take off the heat. To reheat, simply add liquid and warm until smooth and pourable again.
How to carve a chicken:

3 responses to “Guide to Sunday Roast”
Such a lovely blog you have. Loved it. I am a travel blogger from India. Please have a look at my blog as well.
LikeLike
I love a Sunday roast! Roast lamb was my favorite growing up!
LikeLiked by 1 person
[…] Sunday Roast (Tulhoma) […]
LikeLike