
I have been challenging my cooking and baking skills by trying new foods and flavors the past few months. However, there are a lot of days where I just want something I can throw together quickly and know it’s going to taste good with little effort or thought. I also like that these recipes are very adaptable and don’t require any special ingredients. These are recipes I’ve made so many times that I kind of eyeball the measurements without precision, and even with variations or ingredient swaps, these still hold up.
Boxed Mac and Cheese:
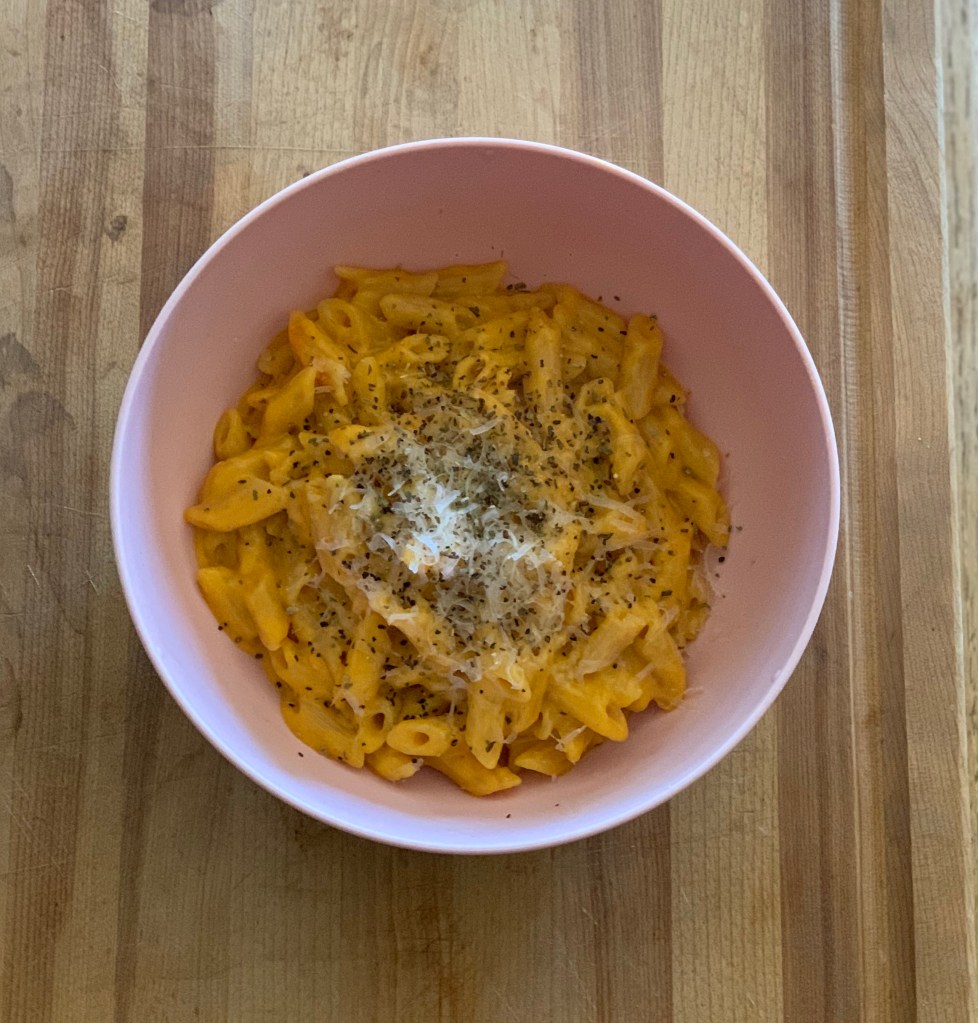
When I was younger I practically thrived off of the small, microwavable cups of mac and cheese. I got pretty creative with the things I added to “enhance” the flavor. This might be considered a weird flavor combination, but it is certainly one I enjoyed, and while I wouldn’t eat this as often now, I would definitely still enjoy this from time to time if I had a craving for it. I did eventually upgrade from cups of mac and cheese to a frozen, smoked mac and cheese from Beechers. It’s very good, but is pretty pricey. I used to buy it when I traveled out of the state, as I haven’t been able to find it in my area, so it was a really nice treat when I was able to get it (and I bought and ate as many as I could).
Ingredients:
- 1 box of mac and cheese (I use Annie’s)
- About 1 tbsp brown sugar
- Paremsean ( grated) or whatever cheese you have that melts well
- Ground pepper and basil for topping (optional)
Directions:
Follow the instructions on the box. When you have the cheese packet, milk and butter mixed in, add brown sugar (more or less to taste), then add as much cheese as you like and warm until melted. You might need to add a bit of extra butter and milk to get to desired creaminess.
Pretty simple tweaks, but it adds some oomph to basic mac and cheese.
*This would also be really good if you have any leftover bacon
Baked Cod and Fries with Homemade Tartar Sauce
One of my favorite local restaurants in Tulsa, Kilkenny’s Irish Pub, has amazing fish and chips! It was the first place I tried the classic dish, so I might be a bit biased, but it is so good and comforting, I order it almost every time I eat there. I decided I wanted to start making it at home, but I wanted to simplify it as much as possible and make a healthier option. I basically just ended up ditching the batter and baked the cod instead. Definitely not a replacement for the real thing, but I think the tartar sauce really pulls it together and brings the fish and chip vibes.

Ingredients:
- 1 piece of cod
- Drizzle of olive oil
- Salt and pepper to taste
- 1 lemon (optional, but I think it adds a really nice flavor to the fish)
Fry ingredients:
- 1-2 medium potatoes (russet and red potatoes work well, but any kind you have is fine)
- 2 tbsp olive oil ( I sometimes prefer to use less, I find they bake just as well with slightly less oil, just make sure they are evenly coated)
- Salt to taste (flaky salt, if you have it)
Directions:
Preheat oven to 425 degrees F. Wash and peel potatoes (peeling is optional), cut fries to desired shape and thickness, add oil and toss to coat evenly, lay fries on a baking sheet lined with parchment paper, sprinkle with flaky sea salt. Bake for about 30 minutes or until desired crispiness. While the fries are baking, put cod in a glass baking pan (or nonstick baking sheet), drizzle with olive oil, add salt and pepper to taste, and squeeze some lemon juice over the fish. Bake for about 15 minutes (time will vary depending on oven, fish should cook to an internal temperature of 145 degrees F). Serve with some fresh lemon wedges and tartar sauce.
Tartar sauce ingredients:
- Mayonnaise
- Sweet relish
Directions:
Start by adding some mayo to a bowl, then add a small amount of relish at a time until you get to a desired taste and consistency.
Salmon with quinoa and pesto sauce
I discovered my love for this flavor combo when I first started eating salmon. I hadn’t really developed a taste for it yet (although I really like it now), so I needed some other bold flavors that paired well with the salmon to be able to enjoy it.
Ingredients:
- 1 piece of salmon
- Olive oil
- Salt and Pepper
- Lemon juice (optional)
- A serving of quinoa (or grain of choice, I like quinoa because the nuttines pairs well with the pesto and salmon)
- Your favorite pesto sauce (I really like Seggiano basil pesto)
Directions:
Preheat oven to 425 degrees F. Place salmon on a parchment lined or non-stick baking sheet, drizzle with olive oil and season with salt and pepper, add a squeeze of lemon juice if you want, then bake for about 15 minutes (this will vary depending on your oven, internal temperature of fish should be 145 degrees F)
While the salmon is in the oven, cook the quinoa (or grain of choice) according to the instructions on the package. Once done, add pesto to taste and warm slightly. Serve with the salmon.
Here are some more yummy salmon recipes, including another version of pesto salmon!
Vegetarian Quinoa Salad
This is a meal I used to make on a weekly basis. It is super easy and you can make big batches if you want/need to. There aren’t really any measurements for this, just add as much or as little of the ingredients as you like. This is also something you can make by throwing together whatever leftovers you have. I like to eat it as a light meal or a snack with some crackers.
Ingredients:
- Quinoa (rice works as well)
- Beans of choice (I like kidney bean, but you can also add tofu, lentils, tempeh, or whatever protein you like)
- Whatever canned or frozen vegetables you have (I like to use things like peas, green beans, carrots, zucchini, squash, etc, but any veggies will work)
- Mayonnaise (vegan mayo works the same)
- Relish or finely chopped pickles
- Mustard
- Fresh produce (tomatoes, cucumber, celery, etc)
- Pinch of salt
Directions:
Cook quinoa or rice according to instructions, steam vegetables (if using fresh or frozen), and prepare any other protein you are using. Once everything is cooked, keep the burner on low and add beans and vegetables to the quinoa until warm. Enjoy as is or make it into a cold salad.
Let the mixture cool for a bit or use cold the next day. Add mayo, mustard, relish or finely chopped pickles, and any fresh produce you have. Mix well and enjoy!
Single Serving Baked Apple Oatmeal:
Since apples have a long shelf life, I have been buying and eating a lot of them recently, and I have been making apple crumble almost every week. I found my favorite thing about it is the oats, so I decided to make more of a baked oatmeal instead of a crumble. When I was looking for an apple crumble recipe (I wanted to make one without flour), this is the one I found and have been using, and what I based my recipe off of. I like eating this baked treat for breakfast with some eggs, or as a snack with some greek yogurt!
Ingredients:
- 1 large or 2 smaller apples (whatever kind you have, also works with other fruits like peaches, pears, and berries)
- 1/2 C of rolled oats (more if you want a lot of oatmeal)
- 2-3 tbsps unsalted butter (I’ve used salted, and it works, just be sure to skip the pinch of salt. I also dont always really pay attention to how much butter I’m adding. Sometimes I’ve added half the butter, sometimes more and it turns out about the same either way)
- 1/2 tsp of coconut oil (optional)
- 1/2-1 tbsp brown or cane sugar (the apples add a lot of natural sweetness so I like to use less sugar sometimes, but add more if you want it to be really sweet)
- 1-2 tbsps maple syrup (I like to use more maple syrup than sugar)
- Water (about double the amount of oats you use, or as soft as you want the oatmeal to be)
- Pinch of salt
- Dash of cinnamon
Directions:
Preheat oven to 350 degrees F. Wash, peel, and cut apples into slices (not too thin, otherwise they can become a bit too mushy in the oven), place evenly into a small glass baking pan, add a splash of water to the pan (this helps the apples not to stick and makes for a really creamy oatmeal on bottom, while the top will be more firm and browned!). In a microwavable mixing bowl or pot if using the stove, add oats, sugar, maple syrup, butter, coconut oil, salt and cinnamon, and water. Mix well and microwave until done (I like to start with about 2 minutes and then do shorter intervals to make sure it doesn’t spill out in the microwave), or bring to a simmer and cook until creamy. Pour oat mixture over the apples and spread evenly. Bake for about 45 minutes, then let cool and enjoy!
*Tip: You can use the leftover apple peels to make your own homemade granola or baked apple chips! A yummy way to cut down on food waste.
*You can easily make a bigger batch by doubling or tripling the recipe
Grilled Cheese Sandwich with Horseradish Tomato Soup (Taryn)
Mainly this recipe just teaches you how to make a good grilled cheese. It’s really easy and all you’ll need is a pan with a lid. Most recipes call for butter for the bread, but I highly recommend using mayonnaise. You don’t get any mayo taste after the grilling, but what you will get is perfectly browned and crisp bread. Plus the mayo is a lot easier to spread on the soft bread. Grating the cheese versus using slices allows the cheese to melt faster before the bread gets burnt. And then to make your tomato soup something special, you’ll add red pepper flakes, garlic, and horseradish. The spice and flavor from these ingredients will make your soup taste fresher and give a subtle hint of a seafood stew without needing any seafood at home.
Ingredients:
- Good bread, preferably something a little soft but sturdy enough to handle some moisture of the cheese
- Mayo
- Meltable cheese, grated. Something like cheddar, colby jack, etc.
- ¼ of an onion, diced
- Canned tomato soup
- Black pepper
- Garlic, one clove minced
- Red pepper flakes
- Salt and pepper
- Prepared horseradish
Turn stovetop to medium and place an ungreased pan (with a lid available) on the heat to warm. Thinly smear mayo on one side of each piece of bread. The mayo side will face outward and be the side that crisps. Grate your cheese and dice your onion. While the pan is still at medium, place one slice of bread, mayo side down, in pan then generously put grated cheese and a thin layer of onions on the bread. Put the other slice of bread, mayo side up, on top of cheese and onions, then cover with a lid. Cook for about 3 minutes then check to see if the bottom side has browned. If not, wait another minute or so then flip. Cook the other side for about 3 minutes until brown and crispy as well. The cheese should easily melt during this time, especially with the lid on, but if the bread is browning too quickly, turn the heat to low.
While the grilled cheeses are cooking, pour canned tomato soup in a pot and cook according to instructions. Add black pepper, red pepper flakes and garlic to the pot while the soup is heating. About a minute before the soup is done, add horseradish to your liking and taste for seasoning.
Beans and Vegetable Soup (Taryn. Recipe here←, along with some other yummy vegetarian recipes!)
This recipe is a quick way to empty out your fridge and freezer of vegetables, and the rest of the ingredients are shelf stable: canned cannellini beans, diced tomatoes, and vegetable stock. It’s easy to make a really big batch of this soup and eat it throughout the week. If you want it to be hardier or customize it each day you can eat with some toast, add cooked rice or other grains, grate some Parsesan cheese on top, or add a splash of heavy cream or Greek yogurt.
Queso with peach salsa (Bethany)
My neighbor makes a really good queso that has a unique flavor. When I first tried it I thought she had added something like cinnamon but then she told me she actually used peach salsa instead of canned rotel. It doesn’t sound like that combination would work but it is actually really good! The peach salsa adds a little bit of sweetness that you wouldn’t normally expect but it’s still just as delicious as its traditional counterpart.

One response to “Easy, throw together recipes”
Nice blogpost and images!
LikeLike